 The preparation required will depend upon the condition of the surface. If it is clean, dry, and sound it will require no special preparation. However, if the surface is powdery or there is other evidence of old distemper residue, it should be dusted off and sealed with stabilising solution. The preparation required will depend upon the condition of the surface. If it is clean, dry, and sound it will require no special preparation. However, if the surface is powdery or there is other evidence of old distemper residue, it should be dusted off and sealed with stabilising solution.
What Is Distemper?
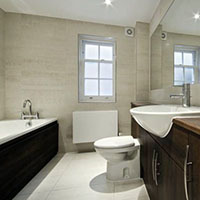
Distemper is a water-based paint that primarily comprises a white base pigment (generally water-soaked whiting, i.e. pulverised chalk) bound with glue. Soft distemper was a common internal finish before the advent of emulsion following the Second World War. Although lime wash was still used indoors, soft distemper seemingly increased in popularity during the Industrial Revolution. Even where a more expensive oil paint scheme was to be executed, new lime plaster surfaces would be temporarily distempered and left one or two years until they had cured. Soft distemper can also be found on lining paper, timber, brick, stone and modern emulsion. It is not dusty if applied correctly, but is unsuitable for highly trafficked or damp areas (cellars, bathrooms etc.).
What It Is Made From?
- Whiting powdered and washed white chalk or lime
- Glue normally made from animal parts
Generally found in older properties and used commonly up to the 20th century before more commercial easy to produce paints such as vinyl and acrylic arrived. Distemper is easily identified. It is soft and dusty to touch and will come off the surface of walls onto your hands. The down side to this surface coating is that nothing will stick to it which is a major problem when you want to redecorate with either wallpaper or paint.
Removal
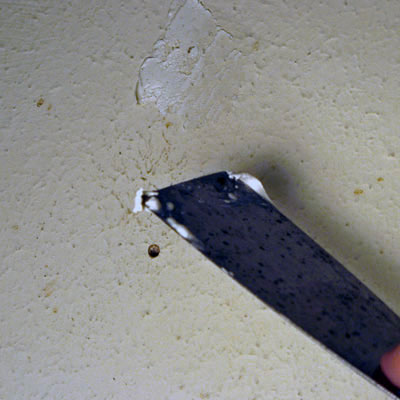
There are several ways this can be done, either by scrubbing with hot water or, the best way, which is to soften it and scrape it off.
Another way is by coating it with wallpaper paste until it can soak up no more. Leave it for ten minutes and add some more. Leave for a further ten minutes then start to scrape off with a normal paint scraper.
Sealing is also an option for distemper but the surface must be completely washed down with hot water to remove all of the dusty, loose particles. You can then use PVA or sealer and there are also other proprietary sealers that can be bought from any DIY store.
Washing Down Old Paint
Modern paints cope surprisingly well when painted over a small amount of dirt; it is however, far better to wash down with sugar soap first. All paintwork should be washed with sugar soap before repainting. Sugar soap may be bought in powder or concentrated liquid form. This should be dissolved in water first before use.
Applying Sugar Soap
- Paint on with an old brush or apply with a sponge. Work it into the dirt using a rubbing or scrubbing action.
- Allow it to act for a few minutes, before rinsing thoroughly to avoid softening of the new paint.
- The sugar soap actually does two jobs. It cleans away grease, dirt and nicotine stains, whilst also etching the paint surface to provide a mechanical key.
Filling Holes And Cracks
Gouges or small indents can be filled without further preparation.
Preparation Of The Surface
Cracks and larger defects will need a little more prep work.
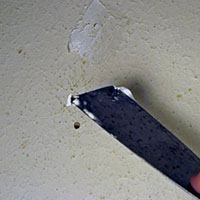
- Cut away any loose material with a craft knife or the edge of an old stripping knife to leave a sound surface;
- Cut out the cracks (widen) to provide a good mechanical key for the filler;
- Run your knife along the crack pointing into the wall first to the left then to the right. This will create an inverted V shape which, when filled, will hold itself in place far better.
Mixing Filler
Mix the filler into an easily workable paste. Using an old cup or container is a lot easier then mixing on a flat board. You can go down the easier route ofready mixed filler, which can be bought at any DIY store.
Sanding the Filler
Smooth Use a sanding block to lightly sand the surface flush.Wear a mask when sanding to prevent inhalation of the dust.
- Put some filler on a board or other flat object.
- Take up some of the filler across the end of your filling knife and scrape this down over the crack or hole, do not over fill.
- With a bit of practice, you’ll find you can fill the hole or crack in one sweep of the knife leaving it fairly smooth and flush.
- Apply a second layer of filler if needed, this is a lot easier and creates far less dust than the rubbing down of over-filled holes.
- To remove any surplus filler, push/pull the filling knife in a scraping motion.
Using Flexible Filler Or Caulk
When filling cracks at internal angles or at the junction between skirting’s/door frames and walls, use flexible acrylic filler. This will allow for a little movement. It is applied using a mastic gun. You don’t have to be terribly neat as it is water-soluble before it dries and can be simply smoothed using a wet finger or sponge. |